Contact Details: Scotch Macaskill, Dirt Road Traders, Currys Post Road, Howick, KwaZulu-Natal, South Africa. Tel: +27 (0)82 578 2329. Privacy: Your privacy is guaranteed. See our Privacy Policy for more. This site accepts advertising and other forms of compensation - see Disclosure and Advertising for details. Site updated: 2022. Copyright © 2002 - 2022 Scotch Macaskill

| ||||||||||
|
||||||||||
|
SEE ALL |
Advantages of Digital Photography when Taking Wildlife PhotosIn a previous article, Affordable Wildlife Photography, I wrote about how new digital cameras, equipped with potent 24x (or more) zoom lenses, are making wildlife photography more affordable.
I'd like to expand on that by highlighting other advantages that a digital camera can bring to wildlife photography and most other forms of photography. (Note: For many who never used film cameras and never had to make the transition to digital, this article will be quaintly archaic - but think of it as being of historical interest!) Although many of these advantages apply to all digital cameras, I am referring here mainly to fixed-lens digital cameras. 1. Compact and Light
The pro wildlife photographer will have three or four camera bodies, each with a different lens, spread around the vehicle within easy reach. But when you're sharing a vehicle with others, who are also paying a premium for being driven around a game park by an experienced guide, you usually won't have this luxury. As in any group situation, some consideration for the comfort of your co-passengers is essential. No one will resent you carrying a small bag containing your digital camera, spare batteries, spare memory card and possibly some filters. The only addition I'd recommend is a small beanbag to use as a support for your camera. This can lie at your feet when not in use. 2. No film and processing costs
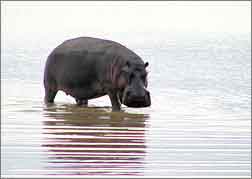
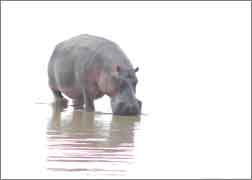
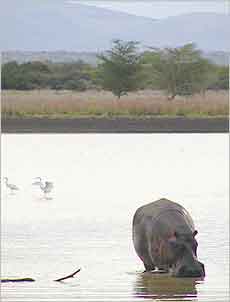
In fact, you should be shooting like crazy. Frame your pictures both horizontally and vertically; zoom in as close as possible, then zoom out to put the subject in perspective, showing some of the surrounds. If the light is tricky, for example backlighting or surface reflections from water, don't be scared to bracket - take a couple of shots under-exposed and some over-exposed. The pictures below of the hippo walking out of a lake at Ndumo Game Reserve in KwaZulu-Natal, South Africa, illustrate this. Although it was overcast, the surface of the lake was highly reflective, influencing the camera's light reading, so under-exposing the dark-toned hippo. I tried to compensate for this by exposing for the hippo, using the camera's spot meter, but this went too far the other way, over-exposing the hippo and blowing out any detail in the water.
More Reasons Not to Hold Back
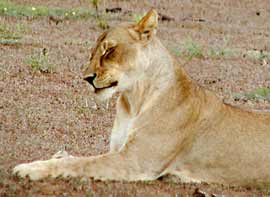
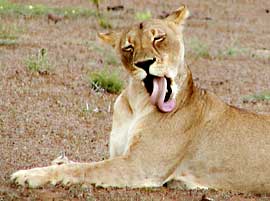
The temptation is to hold back, hoping for some activity. But you won't often see lions close enough to photograph, so don't wait for activity, it might not come. Rather shoot a couple of pictures anyway - this could be your only chance. But once done, don't let these frames be your "limit" for that particular subject. Often the slightest movement - a flick of the tail, a change of head angle - will offer a better picture, so be prepared to shoot again.
3. No Wastage with Digital
You can also preview your pictures and rectify errors. In the "good old days", therew was nothing worse than taking 10 rolls of precious film while on safari, only to find out later that some camera setting (e.g. ISO rating) was wrong or the shutter was defective. Making the Most of Your Digital Images
They're already in digital format, so after some resizing can be posted to Facebook and other social sites, or emailed to envious friends when you get home - maybe even from your laptop and mobile phone while you're still in the bush. But you don't want to be limited to showing your pictures on a computer screen. Easy - save your best shots to CD or flash drive and have hard-copy, "real" photographs printed at your local photo lab. This way you're only paying for the good prints and not wasting money on reject prints destined for the bin. If you take wildlife pictures with one of the new digicams offering 24x zoom capability and 10 or more megapixel resolution, you should be able to have photographs printed up to A3 size (16" x 20") and above. Return to Photo Info page for more photography articles. |
|||||||||
|
|
||||||||||