Contact Details: Scotch Macaskill, Dirt Road Traders, Currys Post Road, Howick, KwaZulu-Natal, South Africa. Tel: +27 (0)82 578 2329. Privacy: Your privacy is guaranteed. See our Privacy Policy for more. This site accepts advertising and other forms of compensation - see Disclosure and Advertising for details. Site updated: 2022. Copyright © 2002 - 2022 Scotch Macaskill

| ||||||||||
|
||||||||||
|
SEE ALL |
Make the Most of Your Digital Images - as Prints or SlideshowsBecause I'm a photographer, people ask advice about buying digital cameras.One of the things that bothers them is how to make the best use of their digital images. As they rightly point out, it's all very well shooting like crazy without worrying about the cost of film but "what do you do with all the photos afterwards?" They understand that one can email pictures to family and friends. But, they emphasize, they like having "real photos" they can keep in an album or scrapbook. Or, if they come from a slide-film background, they want to know how they can show their best photos on a screen. They're old-school and enjoy putting on a slideshow using the trusty Kodak Carousel projector. And I understand where they're coming from. A great wildlife photo of a huge herd of buffalo or thousands of migrating wildebeest cannot be appreciated at postcard size. Project the image on a screen, and you have a much better appreciation of scale and the magnitude of the event. More Options with Digital
There's plenty of slideshow software available at reasonable prices that will allow you to produce sophisticated slide presentations with background music and eye-catching transitions between images. Or you can connect a laptop computer to a projector that transfers the images on the computer monitor to a wall or screen, much like a traditional slideshow. And, going back to the earlier question about wanting "real photos" from digital images, there are a number of ways to produce prints from digital pictures. So when you return from vacation, whether it was the beach, a cottage in France or that long-anticipated African safari, the first thing you need do is select the best images that you'd like printed. You may come back with 200, or 2,000, images from which to make your selection. CD or Flash Drive
Then you face the question: where should you print the chosen few? Owning your own photo quality printer is definitely faster. But is it cheaper? The best answer to that is "Sometimes" - it depends very much on the size of your prints and quantities. You'll battle to beat the prices of commercial labs and online services for 4" x 6" prints, simply because they work in such huge volumes. The point is that it's never been easier to have prints made from your digital images, whether you do it yourself or have them done professionally. If you don't want to copy them to CD or other storage device, there are numerous web sites that offer printing services - simply load your images to their site and the prints will be mailed to you. Traditional Route
The only difference is that, instead of handing over your roll of film, you hand over your CD or Flash Drive. Actually there is another difference - and a major one at that - you know beforehand what your prints will look like and that you won't have to throw out any rejects! Dimensions Matter
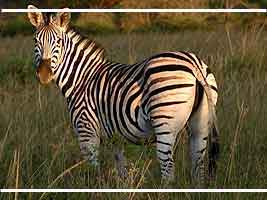
The traditional print size for your snapshots is 4" x 6". This is a ratio of 1 : 1.5 and matches the proportions of 35mm film. Most digital cameras (except for digital SLRs) produce images that have a ratio of 1 : 1.33 - for example 1200 x 1600 pixels. So your standard 4" x 6" print will cause your digital image to be cropped at the top and bottom. Most times this won't matter, but it is possible, if you framed your subject tightly, that you'll find part of your subject's head or feet cropped off (see example below). You can ensure this doesn't happen by using digital imaging software to crop and size your photos to the same proportions as the print. Here's a quick guide:
The image below was taken with a normal 2 megapixel digital camera (1200 x 1600 pixels or ratio of 1 : 1.33) showing how it has to be cropped to fit the 1 : 1.5 ratio of a 4" x 6" print:
Return to Photo Info page for more photography articles. |
|||||||||
|
|
||||||||||